If the transcription from Melody Scanner seems overwhelming to you, you can simplify it by displaying the melody only. In this step-by-step tutorial, I will show you how to do that.
Step 1: Start a New / Open a Previous Transcription #
First open a transcription in Melody Scanner, or start a new transcription with one of the modes.
Step 2: Open the Edit Mode #
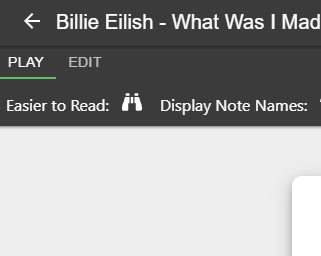
You can now open the Edit Mode by clicking on “EDIT” in the top left corner of the transcription viewer.
Step 3: Select the Simplifying Tool #

Click on the “windmill” icon in the toolbar at the top of your screen to open up the simplifying tool. This will automatically remove all accompaniment notes, so that only the lead melody is left


Step 5: Save your Song #
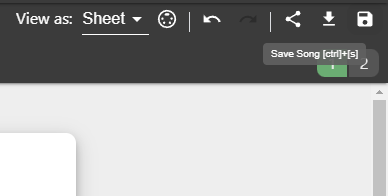
Once you’re done with adding your lyrics, you can save your changes to the sheet by clicking on the “Save Song” icon in the top right corner of the screen.
Feel free to check out the Help Center if you want to learn more about how to use the simplifying tool to only show the melody of a transcription with Melody Scanner.


